Showing posts with label baking. Show all posts

Wednesday, August 7, 2013

"what happens when your macarons don't work" or "a journey to Monte Carlos"

We had grand plans for this week's Bake Day.  Yet again, Pinterest served as our inspiration, as we gathered to create this Hummingbird cake, and these sweet little donut macarons.

Everything was going so smoothly.  We had three layers of the hummingbird cake in the oven, while Lauren worked her magic in the macaron making department.


We stopped for lunch, enjoying a wonderful Donna Hay Fettuccine Carbonara.  A delicious strawberry buttercream was whipped up, and the Hummingbord cake was assembled and iced while the macarons were baking away.


But something went wrong.  Our highly anticipated, much yearned after sweet morsels of magic, fell into a flaky, sticky, gooey mess. It just wasn't a macaron making day.

With our tummies full of pasta and cake, we parted ways that fateful day.


Our two layered Hummingbird Cake - we made it two layered so the third layer could be take away

Ah, but what of the sweet strawberry buttercream.  As I stared at the tub of deliciousness, I immediately thought of Monte Carols.  Those old school shortbread style biscuits with jam and buttercream that we used to fight over as kids, once the Kingstons were eaten of course.

And so the post bake day "lets make strawberry buttercream magic" baking session began, and these delicious morsels were created.


Here's how I did it:

Monte Carlos

Ingredients:
185g butter at room temperature
½ cup brown sugar
1 egg
1 teaspoon vanilla extract
1¼ cups self-raising flour
¾ cup plain flour
½ cup desiccated coconut

For the buttercream:
100g unsalted butter
120g icing sugar, sifted
2 1/2 tbsp strawberry jam

Method:

Preheat oven to 180°C. Lightly grease and line cookie sheets/oven trays with baking paper. Tip: you may need up to 4 trays, but only cook 2 trays at a time.

In a large bowl, using an electric mixer, beat butter and sugar together until light and fluffy. Beat in the egg and vanilla. 

Sift flours together and fold into creamed mixture with coconut until well combined. 

Take a slightly heaped teaspoon of dough and roll into a ball.  Gently flatten to an oval shape, tidying up the edges  as you go then mark each piece with the prongs of a fork.  Allow 4 - 5 cm between each piece of dough.


you can get creative and make a criss- cross design

Bake 12 minutes, until golden. Cool on trays for 5 minutes before transferring to a wire rack to cool completely.  Tip: When the biscuits are cool enough to handle, it is a good idea to match them up into pairs of like sized biscuits, to make the assembly easier

Strawberry buttercream: While your biscuits are baking, beat the butter, icing sugar and strawberry jam together until well combined.  Set aside.

Once the biscuits are cool, place a teaspoon of filling onto the centre of a biscuit and sandwich with a plain biscuit, pressing firmly. Repeat with the remaining biscuits.

Serve with a nice hot cup of tea.  Store any uneaten biscuits in an airtight container.


 Notes:

  • The biscuits featured in the photos are both dairy free and gluten free.  
  • To make these dairy free, replace the butter with dairy free spread in both the cookie dough and the filling.  The biscuits won't be as golden as when they are made with butter but they will still be tasty.  
  • For gluten free, simply replace the flours with gluten free substitutes. 
  • For old fashioned monte carols, follow the directions for baking the biscuits as above.  When it comes to making the filling, omit the strawberry jam.  When assembling, spread a teaspoon of jam onto one half of the biscuits, and then the buttercream on the remaining biscuits.  Sandwich one jam and one buttercream biscuit together, pressing firmly.


We might make macarons again one day... maybe.

But for now, we hope you enjoy baking these delicious treats.

~ Nicole ~

Friday, May 17, 2013

A magical pinterest find comes to life

This week whilst trawling through a very colourful and inspiring pinterest feed, I came across a little jem of cake which immediately caught my eye.  It had a long name but every word of it's title made me drool just a little until it was almost unbearable...

vanilla bean salted caramel swirl cheesecake cupcakes


photo credit: barefootinthekitchen.blogspot.com.au

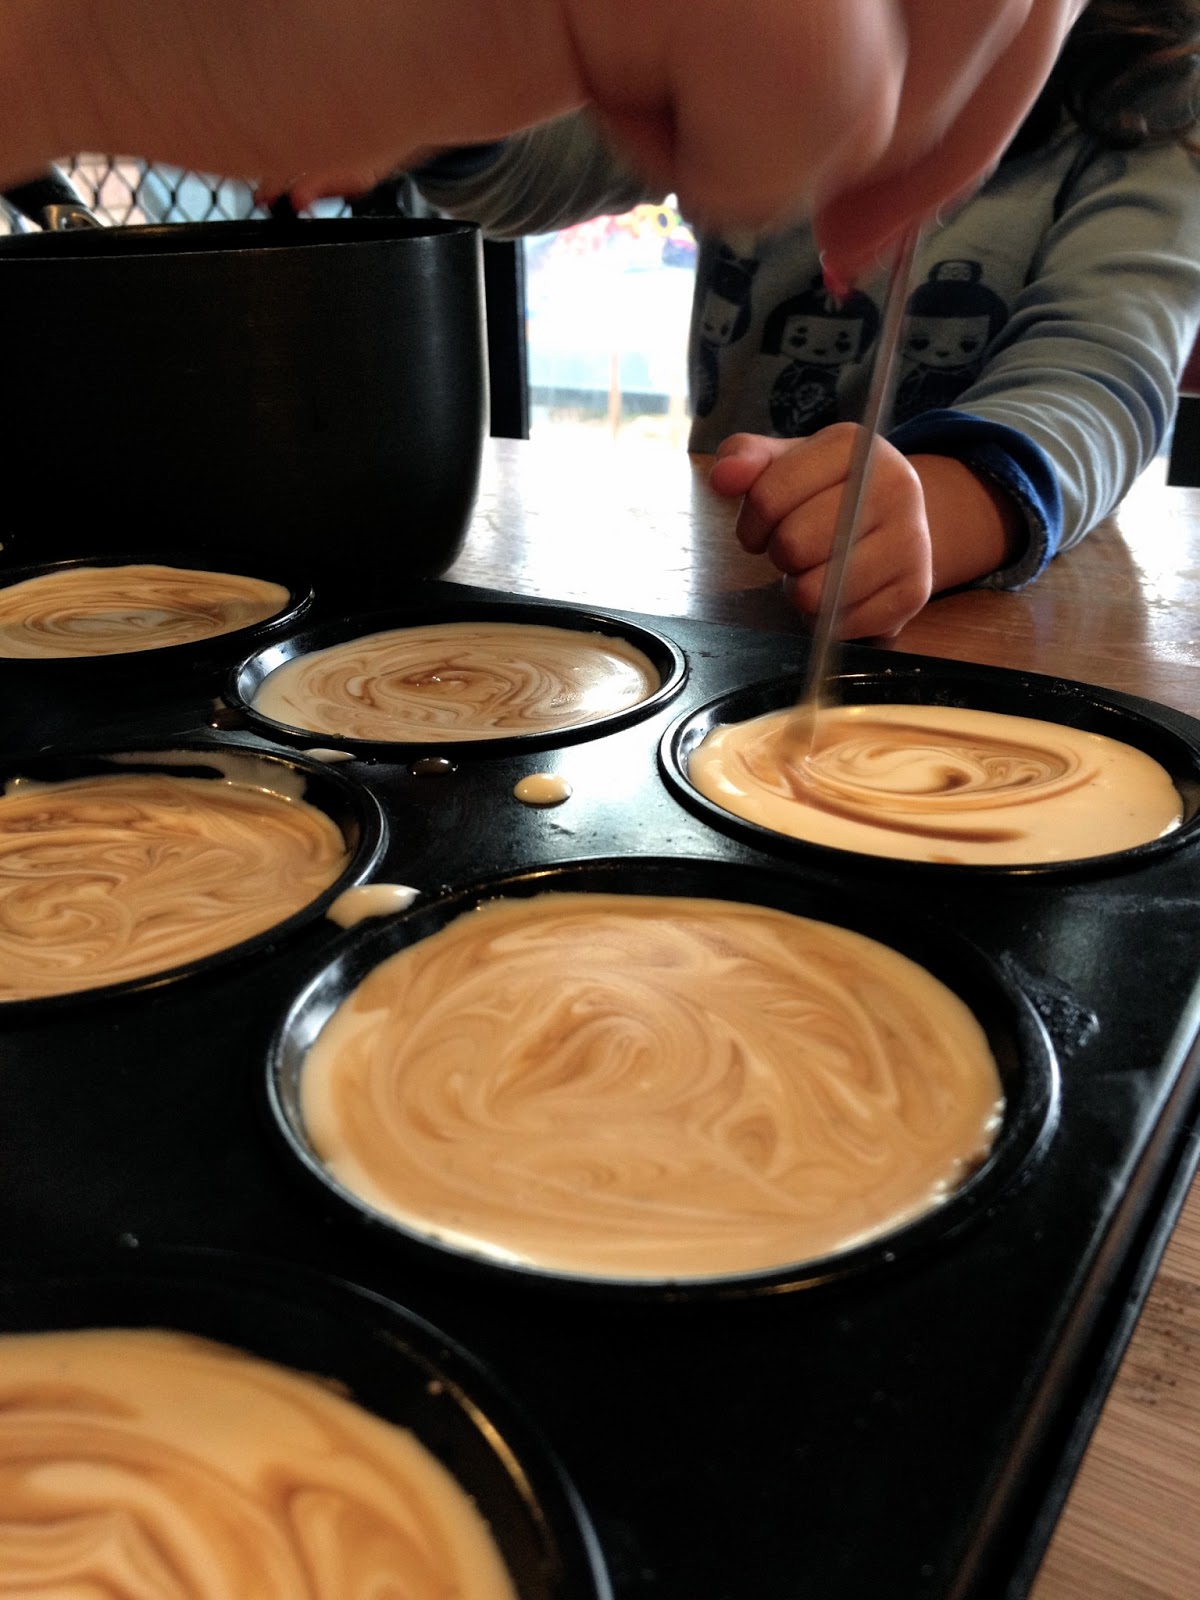
I mean, really, they had me at vanilla, but to team that with salted caramel and put it in a mini cheesecake is like a little taste of heaven I'm sure.  So we set out to recreate this decadent little delight this afternoon.

As it happens, we needed to make a few changes, nothing to detract from the original recipe though, so I won't bother typing it out again.  Head over the barefootinthekitchen.blogspot.com.au and check out the amazing recipe, as well as the absolutely scrumptious vanilla bean salted caramel sauce.  Ah, but check out our yummy photos first...


the biscuit base all ready to take the cheesecake filling

making sure the swirls are just right


perfection!


The recipe says that you should let it set in the refrigerator for 4 hours, but we couldn't resist the need to sample.  Here is the little taste tester, drizzled with warm sauce ready for the tasting...


And the verdict?  "I want this taste in my mouth all the time"

I think that's a winner!

~ Nicole ~

Friday, May 3, 2013

A delicious Banana Zucchini bread


I had a hand of sad looking bananas in the fruit basket this week... they were just crying out to be turned into something amazing.  So I heeded their cry for greatness, and mashed them into this delightful Banana and Zucchini Bread.  


It really is an easy, and delicious bread to make.  If you need to watch your sugar intake, you can use 1 cup of honey in place of the sugar.  The bananas do add sweetness to this bread, so you might even be able to reduce that amount to your liking.  I plan on making a gluten free version soon, stay tuned for an update (once it's successful!)

In the meantime, get your sad bananas into a bowl and make some yummy bread... almost good enough for breakfast perhaps?

Banana Zucchini Bread

Makes two loaves

Ingredients:

3 cups plain flour
1 tsp baking soda
1 tsp salt
1 tsp ground cinnamon
1/2 tsp baking powder

1 cup oil (vegetable oil, or other preferred light flavoured oil)
3 eggs
1 cup of honey OR 11/2 cups rapadura/coconut palm sugar
1 tbs vanilla
2 cups mashed banana (about 3 medium bananas)
2 cups shredded zucchini (unpeeled - about 3 medium)

1 cup chopped pecans or walnuts (optional)


Grease and flour two loaf tins, and preheat the oven to 180 degrees

Combine flour, baking soda, salt, cinnamon and baking powder in a mixing bowl and set aside.

In a separate bowl, beat together the oil, eggs, sugar and vanilla.  Stir in the banans and zucchini. Add this mix to the flour mixture and stir until just moistened, or until no more flour lumps can be seen.  Stir through the nuts if using.

Pour into prepared loaf tins and bake for 1 hour or until a skewer inserted in the centre of the bread comes out clean.

Cool in the pans for 10 minutes before removing from tins and cooling completely on wire racks.

Slice thickly and enjoy!  It's really good toasted the next day with a nice slathering of butter too.

* Thermomixers!  I haven't made the whole cake in the thermomix, as it makes a lot of mixture, but you can use the Thermomix to help you along the way.  If you are using a thermomix: shred the zucchini on speed 5 for a few seconds.  Remove from the bowl and set aside (no need to wash the bowl).  Mash the banana, again using speed 5 for a few seconds.  Then you can add the oil, sugar, eggs and vanilla and mix on speed 3 until well combined.  Add the zucchini back into the bowl and mix together for a few seconds on speed 3.  Continue as above.


~ Nicole ~